A while back I posted an article (
Patterns from Nature) on how to find the
perfect patterns for your quilting projects. My friend Kathy, pointed out that perhaps not everyone enjoyed the lovely fall weather like we did. Therefore, they may not have thought to get great photos of leaves. So to remedy the situation, I am
providing you with a
leaf photo, and a sample of how I would
outline the leaf to
create your own pattern. It can be downloaded by
clicking here.
 |
| This is what the photo and sample pattern will look like. |
After you create your pattern you will need to decide how to use it. I chose to
paint mine
on fabric.
So next I
transferred my pattern onto
cotton fabric. To do this you can use a
light box. If you don't have one you can hold it up to a
window during the day, or you can get a
clear bottom plastic tote and place a
light source inside(I like those "tap on" lights that you can use in closets). I then used a
permanent marker to trace the outside of the leaf pattern, and a soft lead pencil to trace the shading marks(these are the yellow lines on the pattern).
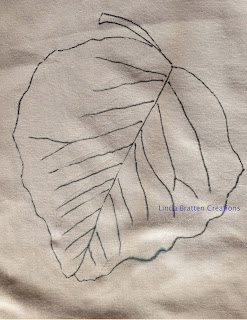 |
| Pattern traced on fabric ready for painting! |
|
|
Finally, I used
Setacolor Moire Paints for Fabrics to fill in the missing color. I
teach a class on this, so I won't go into details on how to paint on fabric. The pattern would work equally well with
fabrics and thread painting.
Here are my finished results---What do you think?
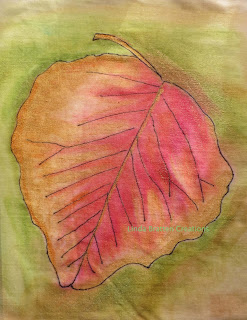 |
| The Bradford Pear Leaf |
Trying to make Fall last a little longer, Linda B.


No comments:
Post a Comment