Yesterday, we finally got our first snow of the season! Maybe it is the teacher in me, but I really enjoy a snow day where you need to stay inside.
I love it when a snow day = a sew day! Sending warm thoughts your way, Linda B.
Friday, December 21, 2012
Saturday, December 1, 2012
Surface Techniques
I just wanted to give you a heads up--this Tuesday I will be teaching a class that explores different surface techniques with your sewing machine. We will be couching a variety of items, layering different substances, and attaching buttons. Then on Saturday we will use this piece for the cover of a notebook to store all your inspirations in! Love to see you at Zede's Sewing Studio, in Columbia, MO.
Enjoy your day, Linda B
 |
| This is my sample for the class. |
Enjoy your day, Linda B
Thursday, November 29, 2012
Using a Photo to Make a Pattern
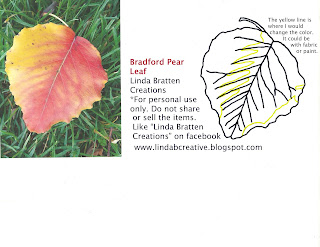 |
| This is what the photo and sample pattern will look like. |
After you create your pattern you will need to decide how to use it. I chose to paint mine on fabric.
So next I transferred my pattern onto cotton fabric. To do this you can use a light box. If you don't have one you can hold it up to a window during the day, or you can get a clear bottom plastic tote and place a light source inside(I like those "tap on" lights that you can use in closets). I then used a permanent marker to trace the outside of the leaf pattern, and a soft lead pencil to trace the shading marks(these are the yellow lines on the pattern).
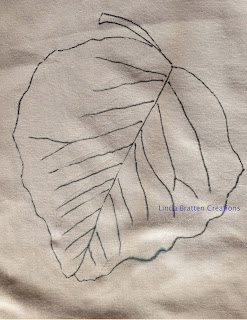 | ||
| Pattern traced on fabric ready for painting! |
Here are my finished results---What do you think?
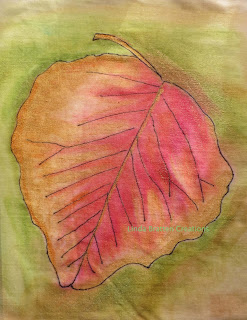 |
| The Bradford Pear Leaf |
Monday, November 19, 2012
It's Time to Share
I have been having so much fun in the classroom teaching, I thought that I would share with you my stained glass applique pumpkin pattern.
Click here for the pattern
We use fusible black bias tape to finish the edges, but the pattern can easily be done as a regular applique.
Have fun creating! Linda B.
Click here for the pattern
We use fusible black bias tape to finish the edges, but the pattern can easily be done as a regular applique.
Have fun creating! Linda B.
Thursday, November 1, 2012
Stained Glass Applique--Making a Bold Statement
I have been busy getting ready for my stained glass applique class. We will be using my pumpkin pattern to develop our skills with fusible bias tape.
I like to include other samples in my class to motivate my students. This pattern is from Gretchen K. Hudock's book: Quick Quilts Using Quick Bias.
It will be tomorrow at Zede's Sewing Studio. Class information is available at www.sewhere.com.
Exploring different avenues of quilting, Linda B.
I like to include other samples in my class to motivate my students. This pattern is from Gretchen K. Hudock's book: Quick Quilts Using Quick Bias.
It will be tomorrow at Zede's Sewing Studio. Class information is available at www.sewhere.com.
Exploring different avenues of quilting, Linda B.
Monday, October 22, 2012
Patterns from Nature
Next print a copy of your photo on plain white paper. If the perimeter of the leaf is hard to discern, use a black marker to emphasize the outline. Also at this time you can use the marker to emphasize veins or areas of color that you want to include in your pattern. Cut the leaf shape out, now you have a pattern to use.
I like to trace the reverse of the pattern on light weight fusible web, and then fuse it to the wrong side of the fabric that I want my leaf to be. Next I cut out the shape on the pattern line and fuse it to my quilt. Once you stabilize the piece, (I like a medium weight tear-away stabilizer), then you can thread paint the veins and do any shading you desire.
You can even use these patterns for your quilting patterns!
Don't forget to try different types of threads, like the variegated thread on the yellow leaves, or the metallic thread on the bottom leaf.
Of course if you don't have a camera, you can get similar results using the low tech method of doing a leaf rubbing using paper and crayons! Hoping to inspire you to a fall project, Linda B.
Thursday, October 18, 2012
Finding Inspiration in Fall
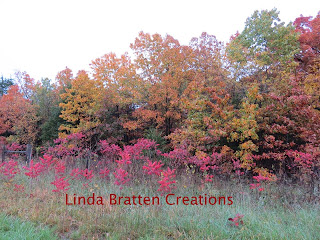
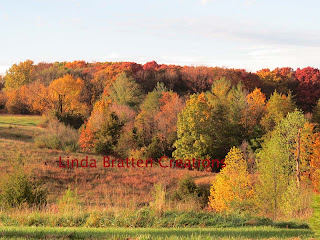
My husband took me on an afternoon drive yesterday. I thought I would share with you some of the photos that I took.
Hoping these views will inspire you as they did me, thinking of warm colors, Linda B.
Hoping these views will inspire you as they did me, thinking of warm colors, Linda B.
Monday, October 15, 2012
Stash Busting Project
On Saturday, October 27th, I will be teaching how to make a ruffled pillowcase with your serger. It is a great project to help reduce your stash if storage is an issue. In addition to using a ruffling or gathering foot for your serger, I will demonstrate how to use decorative non-needle threads to finish off the ruffle for a one of a kind project.
You will be able to find me there Saturday, October 27th, at Zede's Sewing Studio. Class sign-up info can be found at www.sewhere.com .
Sewing along, Linda
Sunday, October 7, 2012
Mixing Things Up
As most quilters, I began to develop my skills creating traditional quilts. However, within a few years I began to paint on my quilts. This is officially my first mixed media quilt.
It was created to participate in a fall challenge for the Beatrice, NE Quilter's Guild Show. The sunbonnet block was a red work pattern from a quilting magazine. I wish that I could remember which one it was! Instead of doing the hand embroidery, I used textile paints to create the block. The rest of the quilt is machine pieced, hand appliqued, and hand quilted.
If someone knows where I found the sunbonnet pattern, let me know and I will be sure to give them credit. I guess that is a big lesson in documenting all information on the back of your quilts!
Peeking into the Past, Linda B
Thursday, October 4, 2012
In the Beginning
I have always been attracted to creating things. I loved my home economics and art classes. I have always been surrounded by those who love to create. My mother loves to hand embroider items, crochet afghans, and now she is into quilting. I will never forget when my grandmother let me use her treadle sewing machine, it fostered a love with sewing machines that has never died!
They influenced me to pursue a career in home economics education (now referred to as family and consumer sciences). This only fueled my passion to create things. After the birth of my first child, I began to create quilts, and I have never stopped!
The purpose of this blog is to inspire others to explore their creative side, and to encourage me to continue to grow in my artistic pursuits.
Let's both have some fun together!
Linda B.
Subscribe to:
Comments (Atom)
