Monday, December 26, 2016

Linda B Creative Outlet

Hoping your time with your family was wonderful!

Are you getting ready for the next year?  Looking for some inspiration? Be sure to sign up for my newsletter, Linda B Creative!  Just go to my website, www.LindaBrattenCreations.com and sign up.


Also be sure to sign up for the Linda B Creative Group on Facebook.  It is where I will answer questions about the Sew-Alongs, patterns, and ideas.  There is already a  bonus there when you sign up!

Hoping 2017 is a great year for you and your family, Linda

Saturday, November 19, 2016

Finishing Up the Craftsy T-Shirt Challenge


The next step in the process was to decide how I wanted to use this new fabric.  I searched my Pinterest page for some inspiration.  I also reviewed some of the classes that I have taught, since it would be easy to recreate something that you have all ready had success with.  I decided that I would use the t-shirt to create a jacket similar to one that I had previously taught using a sweat shirt as a base.

This is the sample from my sweatshirt/jacket class.
Instead of using a sweat shirt, I decided to create a quilted piece of fabric using the front and the back of the T-shirt.  Having worked with T-shirts and quilts, I knew that I needed to back the T-shirt pieces with a stabilizer before cutting them up.  So I fused No Show Mesh stabilizer by Floriani, to the back or wrong side of each of the T-shirt pieces.  I like to use No Show Mesh because it prevents the fabric from stretching out of shape, but allows the T-shirt to follow the shape of the quilting and not be ridged.

Next I straightened the edges of the pieces and decided what I wanted to do to increase the size of the T-shirt fabrics.  I would need  to increase the size of the piece to allow enough ease since the quilted fabric would respond like a woven instead of a knit fabric. I decided to use the peacock fabric in a color block manner that would appear on the sides of the jacket.  I also used the same fabric as a yoke on the top of each piece.  In addition, I pieced some 4-patch blocks to increase the width of the back piece.


Squaring up the T-Shirt Fabric

Inserting the 4-Patch blocks on the back
Adding side and yoke fabrics
Working on the front pieces
Then I created a quilt sandwich and free-motion quilted the front piece.  I used many of my Exploring Natural Machine-Quilting Motifs from the Craftsy class that I teach.  Can you identify any?
Using my Nature Inspired Quilting Motifs to create new fabric!
 Keeping an eye on the clock I knew that I was also challenged by the deadline.  So I examined what remained to be done and the remaining amount of time.

At this point, I decided that I needed to change to a project that could be completed in a shorter amount of time using what I had all ready completed.  So I scoped out my studio, and found a great peacock zipper.  This inspired me to decided to create a zippered pouch!  Something that I could complete in the remaining time.  So I squared up my quilted piece, and got my serger ready to go!

The Quilted Piece with the Peacock Zipper
 I loaded the upper loopers of my serger with a black wooly nylon thread and the lower looper with a black serger thread.  I used black serger thread in both needles and set the machine up for a 4 thread overlock stitch. I plan on folding the quilted piece in half to create the bag.  Since the zipper
is decorative, I am planning to showcase it by sewing an exposed zipper in the bag.  Thus I serged both top edges of the bag to finish off the raw edges.
The serged top edge of the bag.
Next I went to my sewing machine to attach the zipper.  I created end pieces for the zipper by taking a piece of fabric 2" x the width of the zipper.  I pressed the fabric in half so it measured 1" x width of zipper.

Then I pressed the raw edges to meet at the center fold.


I then put the stop end of the zipper in to the end piece and stitch the open end closed.

Inserting the Zipper into the End Piece
Sewing the End Piece Closed


Measure the edge of the bag that the zipper will go on, and trim the zipper 1" less than that measurement.  Then sew the other end piece on the other end of the zipper.

Next place the outside edge of the zipper on the edge of the serger stitches.  Sew the zipper on one side of the bag.  To make this easier unzip the zipper and sew down a portion of the zipper.  Then insert the needle into the zipper and lift the presser foot.  Zip up the zipper, pulling the zipper pull behind the presser foot.  Lower the presser foot and continue stitching the zipper to the top of the bag.

Stitching the zipper on the right side of the bag's edge.


Pull the zipper pull behind the presser foot and continue sewing.

To sew the other side of the zipper you will need to bring the unsewn, right side edge under the unsewn zipper edge.  This will create a tube in which the wrong side of the bag will be on the outside of the tube.  Sew down the unsewn edge of the zipper to the right side of bag in the same manner as the first side.

Sewing in the tube to attach the other side of the zipper.
Next unzip the zipper so when we create the bag we can turn it inside out.  Now with the wrong side of the bag still on the outside of the tube,  place the zipper at the top and flatten the bag to find the center opposite of the zipper. Take the center and push it into the bag about 1" on each side of the center.  This will create a "W" on the bottom of the bag to create depth for the bag.

Looking at the edge of the bag to see the "W" to create depth.
Place a pin parallel and 1" away from the raw edge to hold the "W" in place.  You place the pin there so it never comes in contact with the blade of the serger.

Where to place your pins when serging.
Create a "W" on the other side of the center of the bag. 

Then turn off your serger blade.  It is best not to use a blade when serging around zippers.  Using the same threads and settings, serge down each side. Use a small amount of Fray Block to seal the beginning and ending stitches.  Let the Fray Block dry then trim away the excess tails.

Serged inside seam of the bag.
Turn your bag right side out and enjoy!  I plan on using mine when I travel and do presentations to carry my necessary techie supplies like tablets, hard drives, pointers and adapters. 

Finished bag!
Back side of the bag.
Zipper on the bag
Just to let you know, I sent my photos of the completed bag in before the deadline.  However, I was too tired to share the process with you here till now.  Have you ever created under pressure?  Or changed sewing projects to meet a deadline?  I would love to hear about your sewing adventures.
Sew Long!  -Linda

Thursday, November 17, 2016

Adding a Bit of Color to My Craftsy T-Shirt Challenge


As I continue on with this Craftsy T-Shirt Challenge, I decided that maybe I was suffering from a creativity block due to the size of the project.  So I started to cut one of the shirts apart.  I am a quilter, it is normal for me to take perfectly beautiful pieces of fabric and cut them up.  However, this did nothing to generate the creative spark I was needing. 

So I decided that perhaps a change of color was in order.  I washed both t-shirts to remove any sizing or finishes that my interfere with the paints I was planning to use.  I also avoided using any kind of fabric softening agents for the same reason.


After preparing my table with a sheet of plastic, I gathered the necessary items:
  • Setacolor Transparent Fabric Paints
  • Small containers to mix paint and water
  • A paint brush
  • a spray bottle with water
  • Salt
  • T-Shirts
Because of the limited number of t-shirts, I decided to test my painting skills on a sleeve. I started by using the spray bottle of water to saturate the sleeve. Next I diluted some of the paints with water and touched the fabric allowing them to disperse.  I started with the lightest color, yellow, and finished with the darkest color, the purple.  Then I sprinkled salt on the still damp piece and let it dry.


After a while, I came back and found this! Not the effect I was hoping for.  All the colors blended into mush!  I wanted to have some of the colors to blend together, but didn't expect all the colors to blend together. 

Oh well, I still had another sleeve, so I decided not to saturate the sleeve with water in the beginning.  I only used a slight mist to encourage the paint to stay moist.  That was the key to creating the look I desired!


I also decided to add some larger salt granules to create a larger star burst effect. Since the second test turned out as desired, I proceeded to the front of the t-shirt.


I repeated the same process used on the second sleeve, only I also included some fine salt along with the larger granules.  I was concerned how the Craftsy logo would react with the paints.  I thought perhaps, the paint would remain on top hiding the logo, or that the complementary color choice might make it appear neon.  But I proceeded on motivated by a looming deadline, and I reasoned there is still one more shirt!
Close up of the logo area.
Once the front was done, I proceeded to paint the back of the t-shirt in the same manner.


After both sides were dry, I brushed off the salt(throw it away, do not use again).
 

Next I took all pieces to the ironing board to heat set the paints.


After they were set, I rinsed them in my sink to remove all the salt. Then I dried them in the dryer.  While I was waiting for them to dry I went to my fabric stash to pull possible additional fabrics to use.  This is what I came up with.


 What do you think?  Will the fabric work?  What is she creating?  Will she get it done by the deadline???? Stay tuned for more!

Next I have to prepare for tomorrow's Paper Snowflakes BOM.  See you later-Linda

Wednesday, November 16, 2016

Craftsy T-Shirt Challenge

Help!!! I am looking for some inspiration, Craftsy has challenged the instructors to create something with these T-shirts. I have two XXLs to use. I am not excited about the colors(I am more of a blue/green gal), but I am open to thoughts and suggestions. The deadline is approaching fast!-Linda

Thursday, October 20, 2016

MQX Midwest--Let the Fun Begin!

Click Here for Information about MQX Midwest


I have finally arrived in Springfield, IL, after much prepping and packing. 

This week I will be teaching at the MQX Quilt Festival-Midwest.  My Mixed Media Techniques for Your Quilted Projects is my favorite lecture/demonstration to share.  I will show you how to use a variety of techniques, and the best part is that you do not have to be "artistic" to use these items!

 A brief summary of it is in this slide show that I created.
This class is Friday, October 21st from 4-6 pm.

On Saturday, October 22nd from 1-5pm I will be teaching my Nature Inspired Quilting Motifs.  This hands on workshop is designed to help you develop low-to no mark free-motion quilting motifs to use in your quilted projects.  It is great for the confident beginner, and even though the class is taught on the domestic sewing machine, the skills are easily transferred to the long arm. 


Many of the motifs in this quilt are covered in the workshop!
 
There are still a few openings, and I would love to meet you in person!

Getting ready to see the show!---Linda

Thursday, September 15, 2016

Beware of Peer Pressure in the Quilting World

In my past career as a family and consumer sciences teacher, I saw lots of peer pressure tactics to scare individuals into doing something that they really didn't want to do.  Usually this happened with lots of negative consequences, just think back to your own jr. high/high school life.  So during the 2015 Machine Quilters Showcase (MQS), those same feelings came right back.  I was standing at the International Machine Quilters Association product table examining the items for sale, when my two "friends" standing next to me look at me and say, "We should enter the fabric challenge for next year."  They each immediately grab a fat quarter.  As I hesitated, the taunts began, come on you can do it, it's only a fat quarter, it doesn't have to be a big piece.  (Just a disclaimer, it has been well over a year, and this is what I heard or perceived what was implied)  I mentioned that those really are not colors that I use, I am very busy,  and eventually I ran out of excuses.  So I bought the fat quarter, I mean it was just a fat quarter what could it lead to, right?
The Challenge Fabric


On our way back to Missouri my "friend" Sheri and I did a little retail therapy.  I began to look for coordinating fabrics to add to the challenge fabric, remember these were not colors that I normally used.  I found several pieces, then I let the project ferment, I had till next year, right?

It was like a small nagging reminder in my sewing room.  Every time I moved the pile of fabric over to work on another project, I realized it wasn't going to sew itself.  Then about February, Sheri and I met to discuss our plans for the 2016 Machine Quilters Showcase.  I asked her if she had started her fabric challenge quilt and she proceeded to draw a sketch of what hers would look like.  I had nothing to share, so the pressure was on!

Within the next two weeks, I started playing around in EQ7.  I would design a quilt and then scrap it.  I would look at that challenge fabric, then hate myself for giving in so easily.  Finally I created something I thought that I could live with.  It was a piece that had 5 New York Beauty blocks that varied slightly and I thought it would be ok if I was able to foundation paper pieced them all.  So I printed the  patterns, and they sat.

You  know there is nothing like a deadline to motivate a busy person.  So I got my patterns out and decided to start with the center block.  After ripping out the piece several times, and changing color choices several times, I completed the center.  I then decided that a different plan would be needed to create the remainder of the quilt.  I can also let you know that I will not be teaching this technique anytime soon!
My New York Beauty

I sat and stared at the challenge fabric, and nothing came to me, so once again I set it aside.  I could have walked away, but this feeling that I would be letting the others down kept coming back.  So the next day I pulled it out and stared at the fabric again.  All of a sudden,  I started seeing salted rims on margaritas, I heard mariachi music, and I was motivated.  This piece could be fun, if I just changed my attitude toward it.  (Disclaimer 2, I am not usually motivated by alcohol, but it does help in certain circumstances)  So how could I give this piece a dash of salsa that it was calling for?

It finally hit me, do what you know. During this time period I was teaching a Dresden Plate Block of the Month. Each month we explored a different way to create a Dresden Plate block, so I had variety of options.  Instead of using the three quarters of a New York Beauty Block I substituted a three quarters of a Dresden Plate block.  I also combined different techniques for interest and variety.
Testing out which colors to use.

There were still some decisions to be made.  So like any normal quilter I turned to my friends, and fellow quilters for feed back.  I sent text messages and photos to Sheri.  She being an instigator in this process, was always very positive.  I also took my pieces to a Sewing Club that I attended and got some great feedback from them.  Finally, I asked my husband.  He is not a quilter or to my knowledge has not used a sewing machine for any duration, but I trust his judgement, he chose me, right?  He was also positive in his comments, and helped me finalize my color choices.  So I proceeded to finish the top, just in time to submit the entry application.  The quilt didn't have to be finished at that time.  So I set it aside, I had to get ready for the Quilt Art Show, prep for classes, and of course get ready to teach at MQS.
Getting feedback
Considering different techniques

Before you know it, the deadline for sending in the entry was fast approaching.  So I hunkered down to quilt the piece.  Now I love to machine quilt on my domestic machine, I love it more than all the other parts of creating a quilt.  But once again, I suffered from a creative block, not knowing how to proceed.  Since time was a factor, I decided to start quilting the areas that I had a plan for.  As I proceeded, more ideas came along and I was able to finish the piece.
Checking out the backside


I'm sure that many of the struggles I encountered with this piece stemmed from being "pressured" into participating.  I really never fell in love with the piece or the process.  I was even hesitant about sending it in, I felt that I may not have been my best work.  So after discussing this with my husband, he convinced me that I had nothing to lose, the project was done, and I wouldn't be letting the others down.  I was still hesitant, this would be my first entry into a quilt show after a 24 year hiatus.
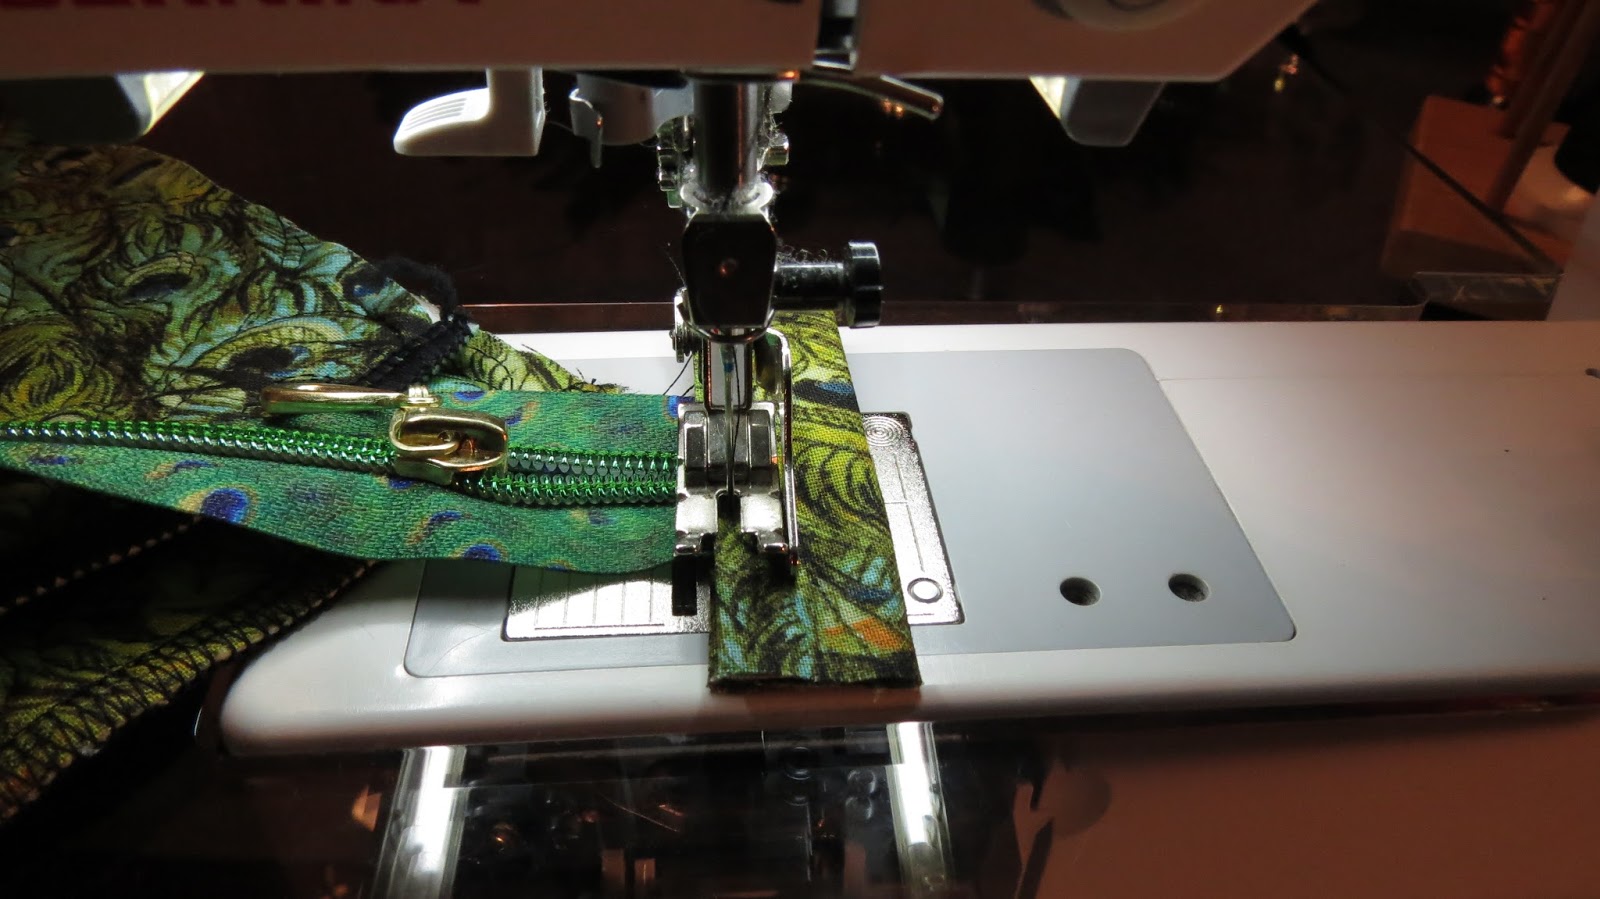
Adding the sleeve.

So I proceed to mail the piece in.  As the event neared I became excited to see what the others did with their challenge fabric.  Also getting ready to teach four classes kept me pretty occupied, so it was easy to not give it much consideration.  When we finally did get to go through the quilt show, I noticed that there were 12 entries in the fabric challenge category.  I wondered if others went through the same struggle that I did?

Then the email came, inviting me to attend the awards ceremony for the quilt show.  Could this be?  I showed it to Sheri, she didn't seemed surprised.  I forwarded to my husband, he didn't seem surprised.  I had to wonder, why was I the only one who was truly surprised?  I sometimes think that as quilters/sewists/creatives we often don't perceive  our talents/creations as others do.  This is something that I need to work at.
Margaritas After Midnight at the 2016 Machine Quilters Showcase

I am honored to say that I received a 3rd place ribbon.  Who knew that a little "positive peer pressure" could get me there.  Even though the struggle was real, I learned a tremendous amount about myself during the process.  I also challenge you to exert some "positive peer pressure" on your friends.  Encourage them to learn a new technique, use a different color pallet, or even learn to quilt.  Feel free to share your stories of peer pressure in the quilting world,  I would love to know that I am not alone.

Broadening my view, Linda


Tuesday, March 22, 2016

My Art Quilts at the Daniel Boone Regional Library Quilt Exhibit-Art Quilts


I’m so excited! This weekend I received notification that three of my quilts have been selected to be in the Daniel Boone Regional Library 2016 Quilt Exhibit-Art Quilts.  The show will open April 2nd and run through the 16th at the Daniel Boone Regional Library in Columbia, Missouri.


The quilts that were selected are: My Fantasy Garden Blue Pansies, and Peacock Passion.
 Check out this fun video about my entries!


My Fantasy Garden was created to showcase my nature inspired quilting motifs that I teach online and at other venues.  It is a whole cloth quilt that is machine quilted using my home machine.  After the quilting was complete, I went back using a variety of textile and acrylic paints to enhance the quilting.  I love to thread sketch with my sewing machine.  This piece has become one of my favorites because of the colors and the designs used.


Photography is an important element in my work. In this case it became the piece. I used Adobe Photoshop to create a water color effect of my original blue pansies photograph. Next I printed the image onto fabric. The quilt top was pieced together by machine. Next came the fun part, using my home sewing machine I quilted the piece using a variety of threads. It was like coloring in a color book, only with different mediums. I really enjoy photo transfer as it lets me be creative in what I love to do the most, machine quilting.


My Peacock Passion piece was for a local sewing store’s challenge to use 3 things found in a hardware store in your project. I began by sketching a peacock and then painted the peacock on silk. Then using fabric folding techniques I created water lilies to enhance the border fabric. I machine embroidered the thread peacock feathers and used beads, ribbons, trims, and a peacock feather to further embellish the project. It is machine pieced, and machine quilted on the home machine. The three items from the hardware store are: washers, gold spray paint, and permanent markers. All were use to create Chinese coins to embellish the piece.

This exhibit features art quilts created by area artists, and on April 16th they will have a tour of the exhibit guided by some of the quilt artist.  This will start in the lobby at 2:15 pm. After the tour, there will be refreshments outside the Friend’s Room preceding a presentation about the Big Muddy riverscape quilt. . The quilt show is curated by Mindy Smith, quilt artist and CEO of the Boonslick Trail Quilters’ Guild and funded by the Daniel Boone Regional Library Foundation.

So if you are in the area stop in and check out my pieces!-Honored to be included, Linda